Showing posts with label Wood Crafts. Show all posts

Sunday, May 29, 2011

scrapbook sundays #12

I'm over at Vintage Sheets blog with a GIVEAWAY!
Plus don't forget about the giveaway going on HERE


Let's see who linked up last week!

Very Haute Housewife made this adorable mini album!


Daily Chrysalis made this memorable LO about her son's toys!

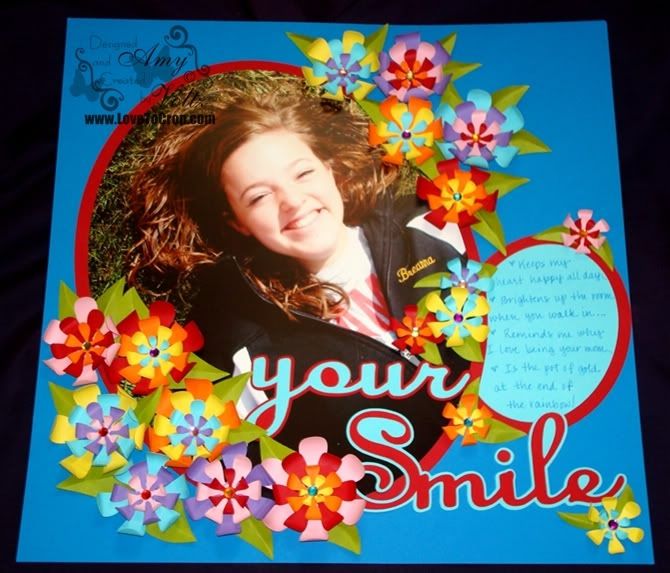
Love to Crop made this colorful LO!  I love those flowers!


Thanks Ladies!  Grab yourself a feature button!

Here's what I did this week:
I actually did this last week but I haven't had time to do anything.  End of the school time is crazy!
This is a growth chart that I used with spray paints and yellow cardstock.  I used the eCraft to cut out the numbers!  I loved how it turned out!


I'm linking up to THESE parties!


Alrighty, your turn!
Link up anything scrapbooking related!

Please grab a button and add it to your post or blog.
If you have a feature button or link, i'll feature you!


Wednesday, May 25, 2011

chevron growth chart.


I've been so excited to show you guys what I did over the weekend!
I was brainstorming on a gift to do for a 1 year old and thought this would be perfect.
and it doesn't hurt that i made this for free!


I had all the supplies on hand.  I even found that piece of wood out of a "free wood" pile in town.

it's your lucky day because i'm going to show you how I made it :)

I started with a piece of wood, sanded down and ready to be painted.

I used "Smoke Gray" by Krylon.

Next I took an old Cricut cutting mat and taped on a chevron patterned that I got HERE.

I used my pink box cutter and cut out the design.  I initially was going to cut out lots of rows but that sucker was a big fat pain to cut so I stuck with 1 row.

I then placed it on the board and sprayed some "White Primer" by Krylon on it.

I just eye balled it down the board until I covered the whole thing.


Of course, it started raining while I was doing this so I brought it inside to let it dry...

Next stage was cutting out numbers and marks for each inch.  I used my eCraft to cut them out.  You can see the demo I posted a few days ago on how I did that HERE.

I used a ruler to measure and mark the inch marks.


I started the ruler at 1 1/2 feet.  Wasn't sure how tall her son was but thought that would be a safe #.
I used good ol' Modge Podge & added the feet markers like so:

Then I cut up more tick marks for the other inches.


I just started putting them on my marks.

And Walla!  I love how it turned out.  I am loving chevron.  So hot right now...

My friend loved it, which made it all worth it.


Here it is, all wrapped and ready to go.  
haa haa I  used normal lined paper as wrapping for the ease of it since this is an awkward shape. 
Ironically, I love how that looked :)

I think more of these are in the works for my own kids now!
I'm linking up HERE!


Thirty Hand Made Days

Tuesday, March 29, 2011

tidy-up tuesdays: DIY ribbon rack tutorial.

Here's my new ribbon rack...
So remember this gun rack(?) I got at Sal's the other week for $1.99?

I was in the neighborhood for another ribbon holder & 
it reminded me of the last one I made so I went to work.

Got it sanded down...


And spray painted it an off-white color.

Then got some patterned paper and modge podge...

Did some measurements...

Cut some paper...

Modge podged the paper on and did some trimming...


Inserted my dowels and ribbon and placed them on the rack!

Done! 


So nice to get the ribbons in one place!
My craft room is one step closer to being done!

So how do you organize or store your ribbons?

Wednesday, March 9, 2011

DIY Book Wreath..for only .45 cents!

What you say?  Another book wreath?  yep.
I just had to do it.  It's a little different so I feel justified in it.
and how could I not share how to make this?  it's just too cute.

And let me break down the cost for you.
old paperback book: .25 cents from Sal's (that's short for salvation army...I just made that  up)
Circle wreath: .20 cents from Sal's...You definitely want to take advantage of their 50% off day!

So grab your glue gun and let's get to work.

Try to find a book with old-looking pages....and one that no one would ever ever ever read.  Yes, that means you, Tiger Shark.
Rip out a page.

Next, rip that in half.

Use your finger..or a battery? to wrap the square page around.

Now grab the paper.

Flatten it on the table.

Put hot glue on the flat side of the paper.

Then wedge and stick that paper on the wreath and hold briefly.

Now repeat those first few steps  until the wreath is covered to your liking :)

Half way done!

Also, if you want a ribbon attached to it, do this before you finish so it can be easily placed.
I just wrapped the ribbon around a small piece of wood and hot glued it.

Almost done!

Whala.  Not too shabby for .45 cents!

Have you jumped on the book wreath wagon too?

I'll be linking this to THESE parties &
DIY Club

Visit thecsiproject.com